
Make your own stained glass art
Creating your own stained glass masterpiece isn’t very difficult.
Provided you have the right tools, a good work space and have no problem following a pattern, almost anyone can create their own glass art.
The pattern and guide below should help you refine your techniques and provide you with the skills to try more difficult projects later on.
SMALL HANGING PANEL
GLASS REQUIRED
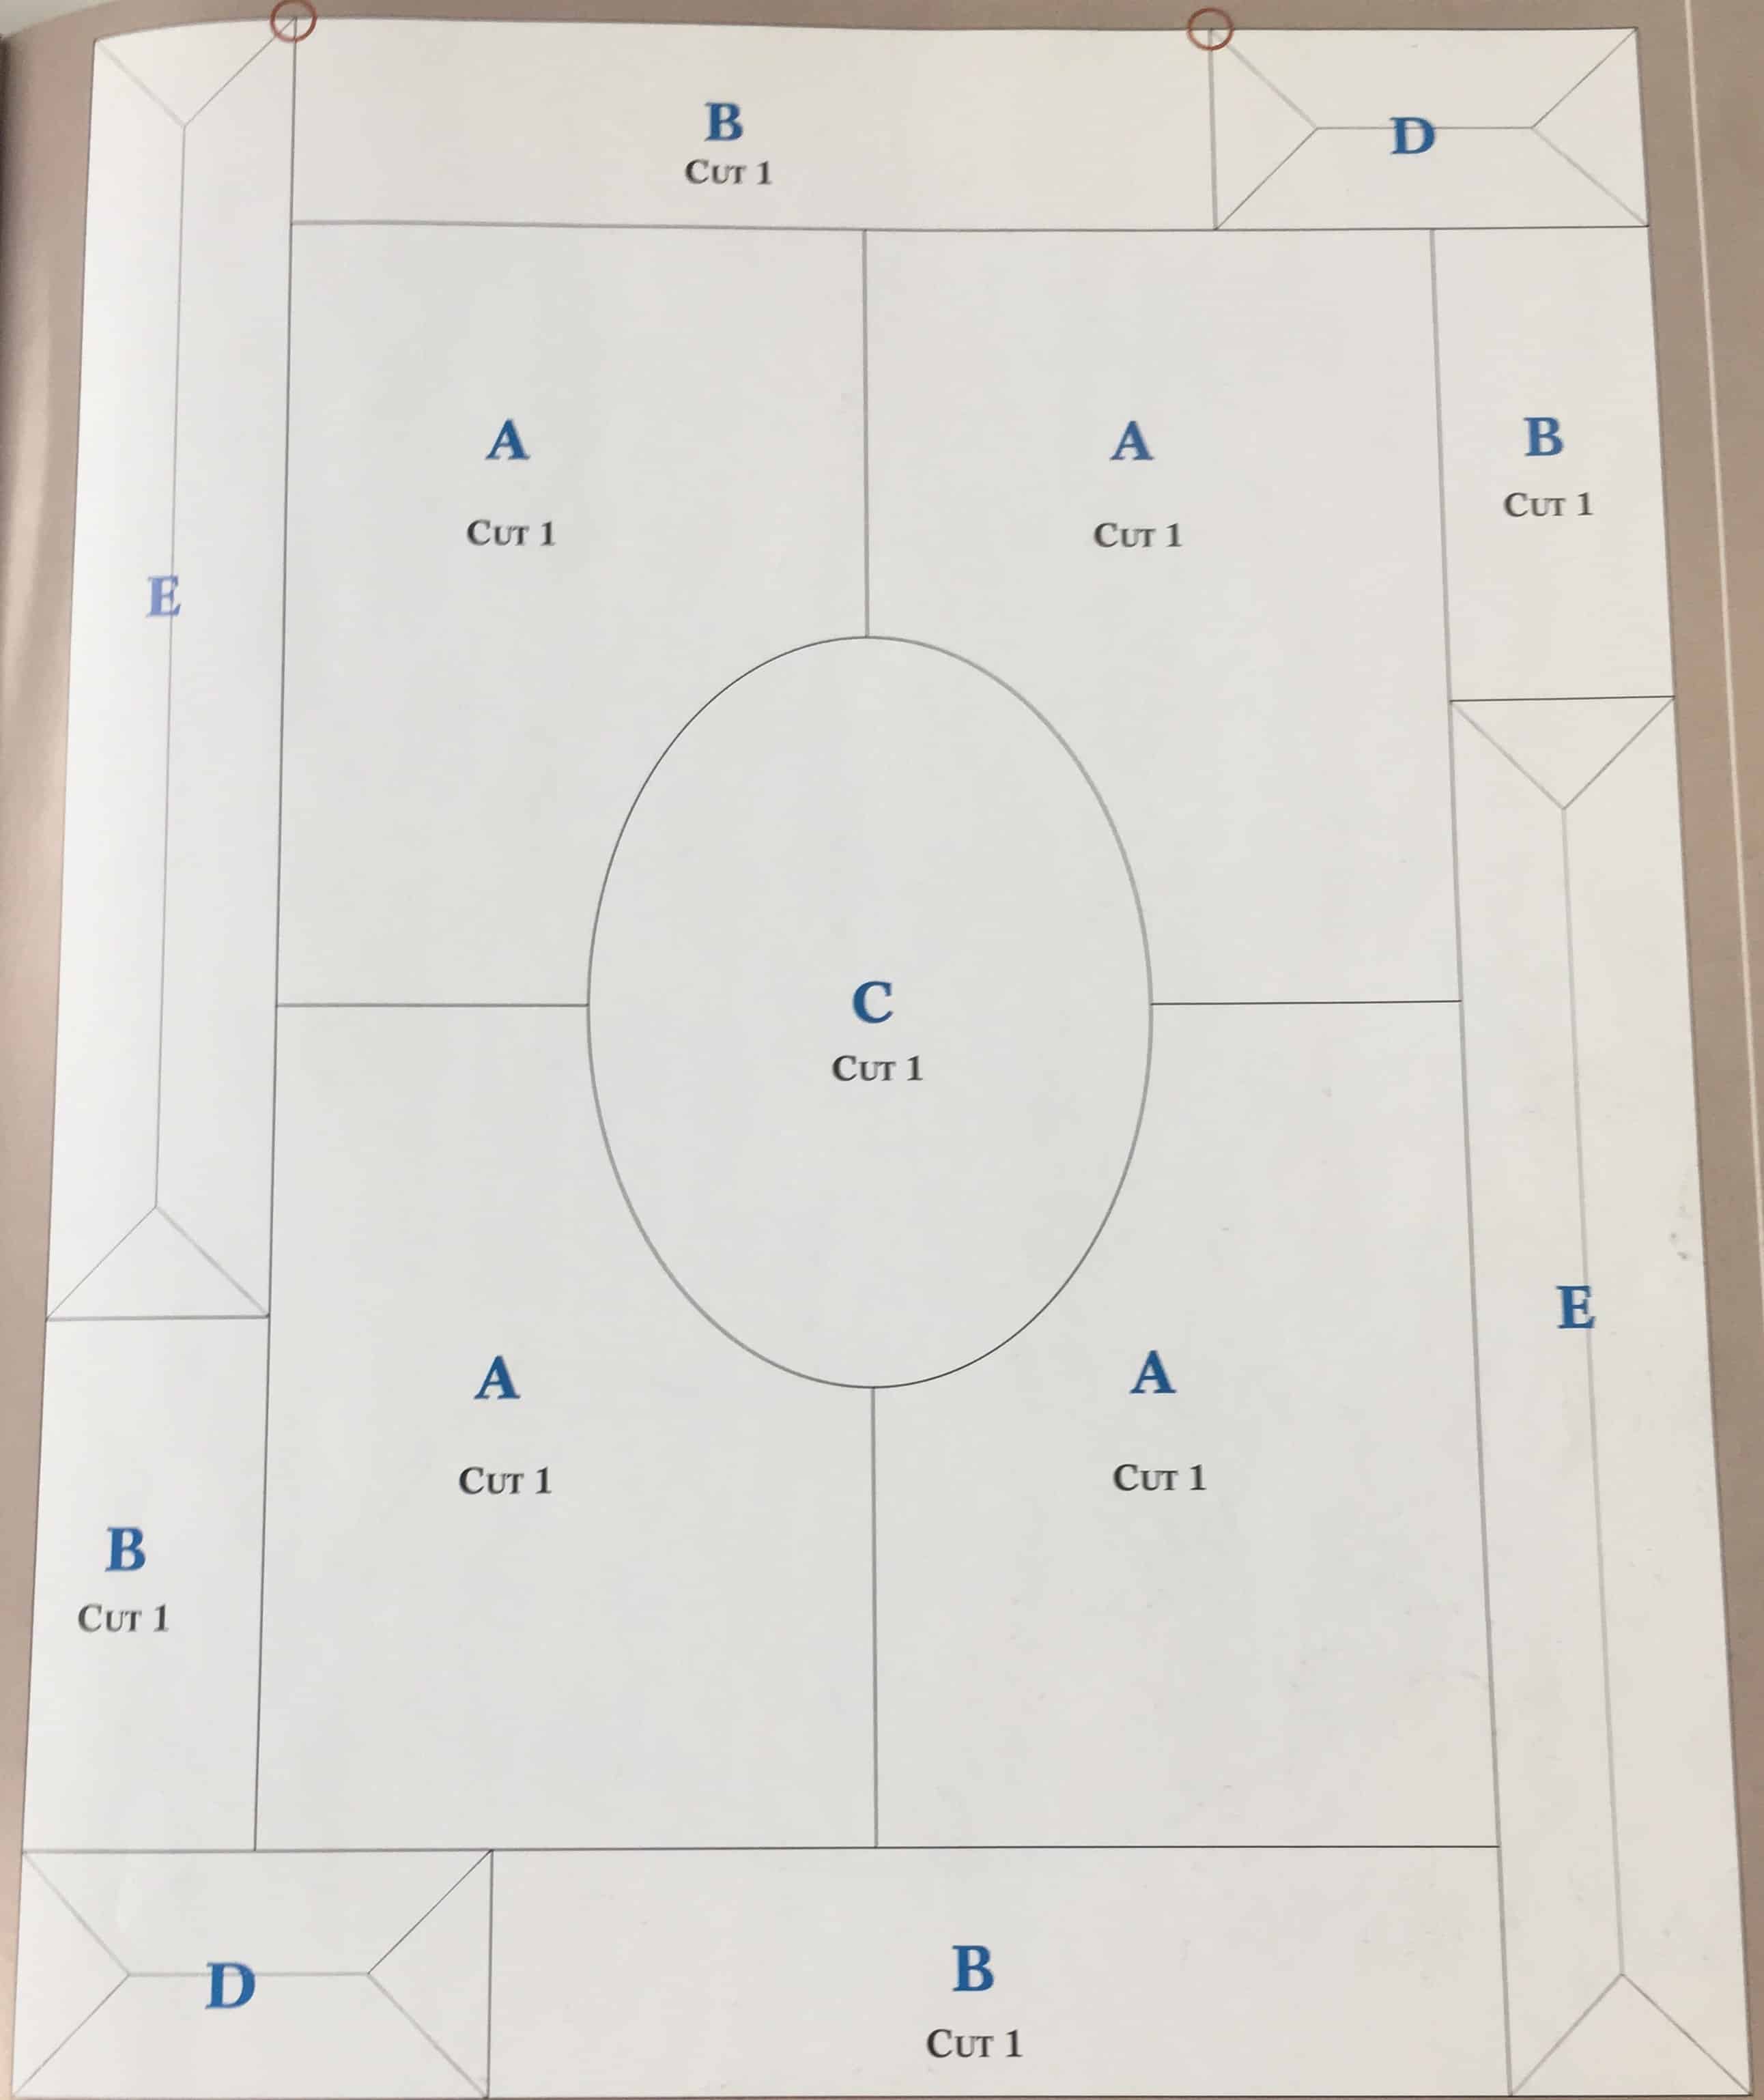
A. 5-1/2in x 7 1/2in lilac wispy – B. 3in x 5in grape cathedral – C. 3in x 4in clear textured – D. 2 – 1in x 2in clear rectangular bevels – E. 2 – 1in x 6in clear rectangular bevels
This quantity of glass is the exact amount needed for the pattern. You may wish to purchase additional glass.
MATERIALS
2 copies of pattern
Newspaper
Wood board
Wood trim
Masking tape
Silver backed copper foil
Safety flux
60/40 solder
1/8in single channel
U shaped zinc came
18 to 20 gauge tinned copper wire
Neutralizing solution
Wax or finishing compound
Monofilament line
TOOLS
Apron
Safety glasses
knife or scissors
waterproof marker
Cork back straight edge
Glass cutter
Running pliers
Breaking pliers
Hammer and nails
Glass grinder
Cloths
Doweling
Soldering iron
Fibre sponge
Cotton swabs
Side cutters
Small square
Toothbrush
Cup hook screws
PREPARING THE PIECES
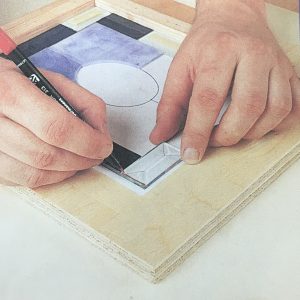 1. Make two copies of the pattern below (Use one as a guide for cutting and breaking the glass pieces and the other for fitting and soldering the panel together.
- 2. Using the marker, trace each pattern piece on the glass to be cut.
- 3. Cut each piece of glass required making sure to cut inside the marker line. Use the cork backed straight edge to help score straight lines.
- 4. Mak a jig (frame) to help fit the pieces together accurately.
- 5. Grind each piece of glass as required to fit the pattern. Leave enough space between each piece so that the line is visible. Rince and clean each piece to remove any grinding residue.
- 6. Check the pre cut bevels fit the pattern and grind if required.
- 7. Choose the width of copper foil appropriate for the thickness of the glass. Wrap each glass piece with the copper foil, crimp and burnish down the edges with the doweling.
ASSEMBLING THE PANEL
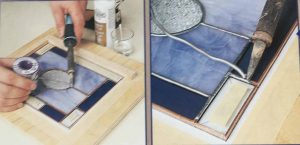
8. Arrange foiled pieces on the pattern in the jig and tack solder the pieces together.
9. Tin all exposed copper foil on the interior seams. Solder no closer than 1/4 in to the outside edge. Space must be left around the border to allow for ease of fitting the zinc border.
10. Bead solder the seams of the panel
11. Turn the panel over and repeat steps 9 and 10.
- 12. Using a pair of side cutters cut a length of zinc came for each side of the panel. Use the pattern as a guide for the length. Cut each piece at 45* angle.
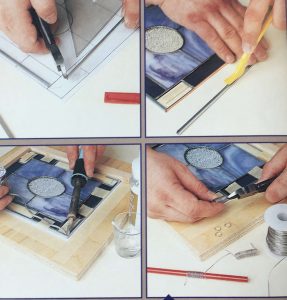
- 13. Fit the zinc onto the edges of the panel. If the glass is thicker than the channel, use a lathekin to make it wider. Use masking tape to hold the zinc in place until it is soldered.
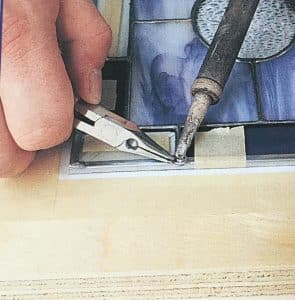
- 14. Solder the zinc in place at each point it meets a solder seam on the panel and at each point of the four corners. Repeat on opposite side of panel.
- 15. To make hanging loops for the panel wrap the tinned wire around a small cylindrical object (pencil or doweling) several times to form a coil. Slide if off and cut the loops off the coil.
- 16. Place loops so the panel will hang properly and safely. Attach and solder.
- 17. Clean the panel.
- 18. Apply finishing compound or wax
- 19. Use monofilament line (fishing line) to hang the panel.
PATTERN
Subscribe To Our Newsletter.
Join our mailing list to recieve hints and tips delivered directly to your in box each month!
0 Comments